Getting Started with Postman
Postman is an API platform for developers to design, build, test, and collaborate on APIs. This step by step guide will show you how to get up and running with Postman and execute your first Axiz Digital API call.
Step 1: Download and install Postman
-
Visit the Postman website:
- Download the Postman platform..
-
Download Postman:
- Click on the "Download" button.
- Choose the appropriate version for your operating system (Windows, macOS, or Linux).
- Once downloaded, install Postman.
Step 2: Sign up or log in
-
Open Postman:
- Launch the Postman application once the installation is complete.
-
Sign up or log in:
- If you already have a Postman account, click on "Sign In" and enter your credentials.
- If you don’t have an account, click on "Sign Up" and follow the prompts to create a new account.
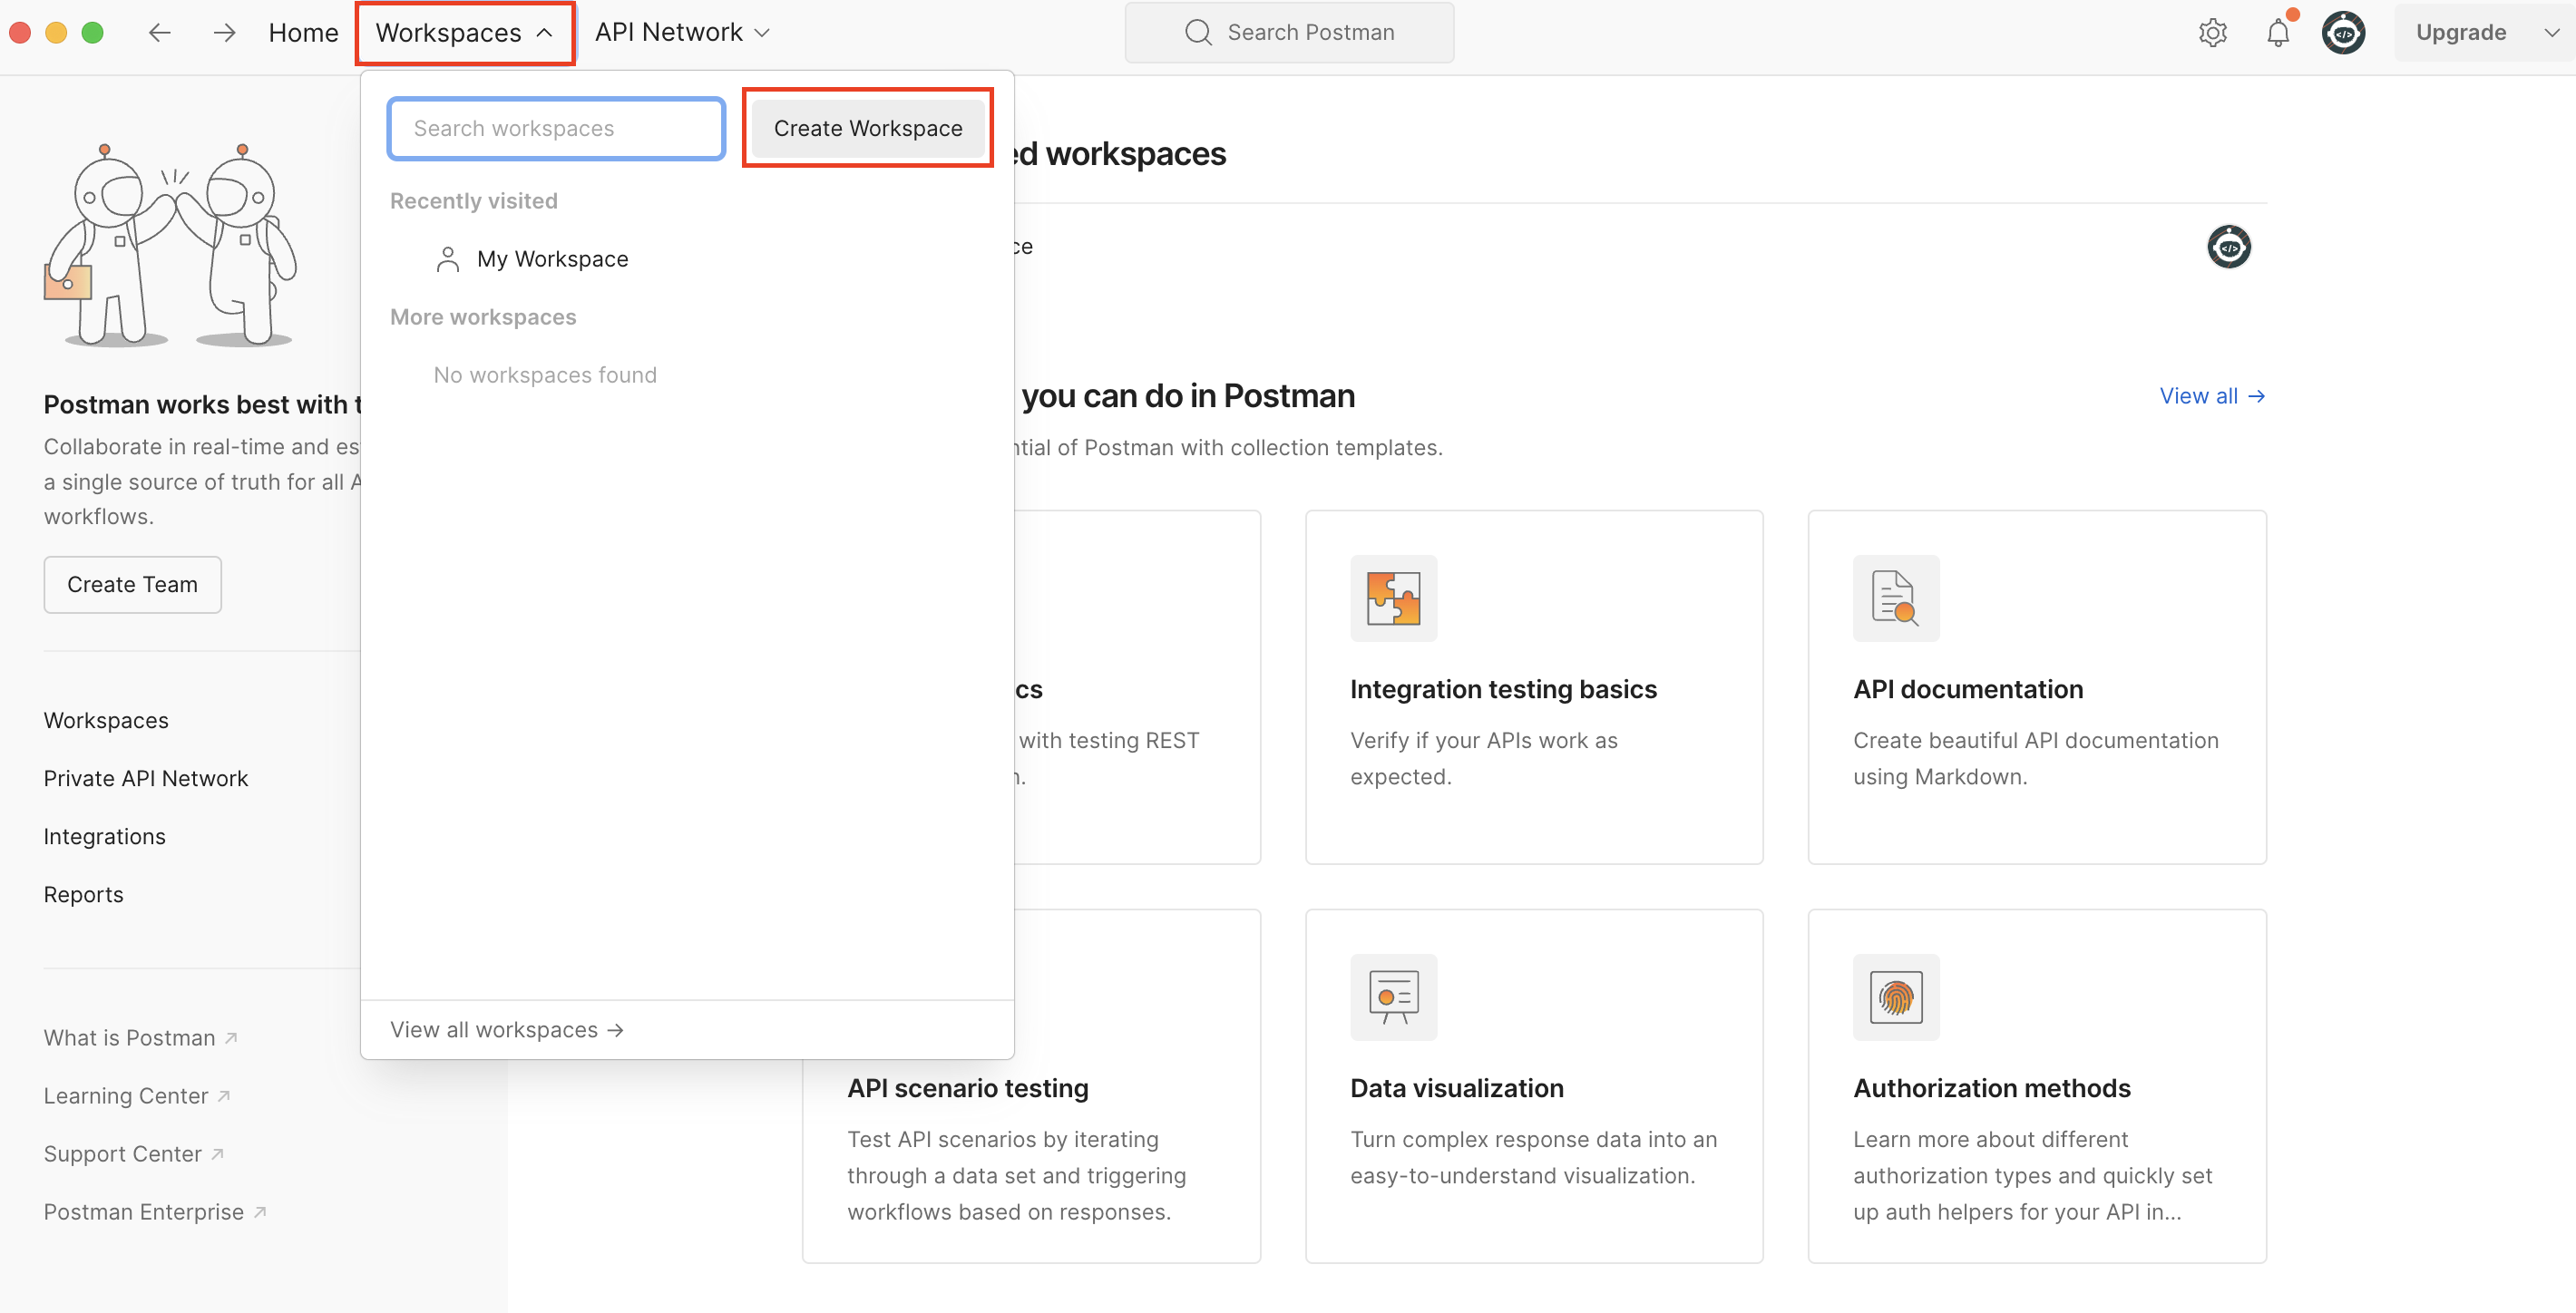
Step 3: Create a new workspace
- Create a new workspace:
- Click on the "Workspaces" dropdown in the upper left corner of the Postman interface.
- Click on "Create Workspace."
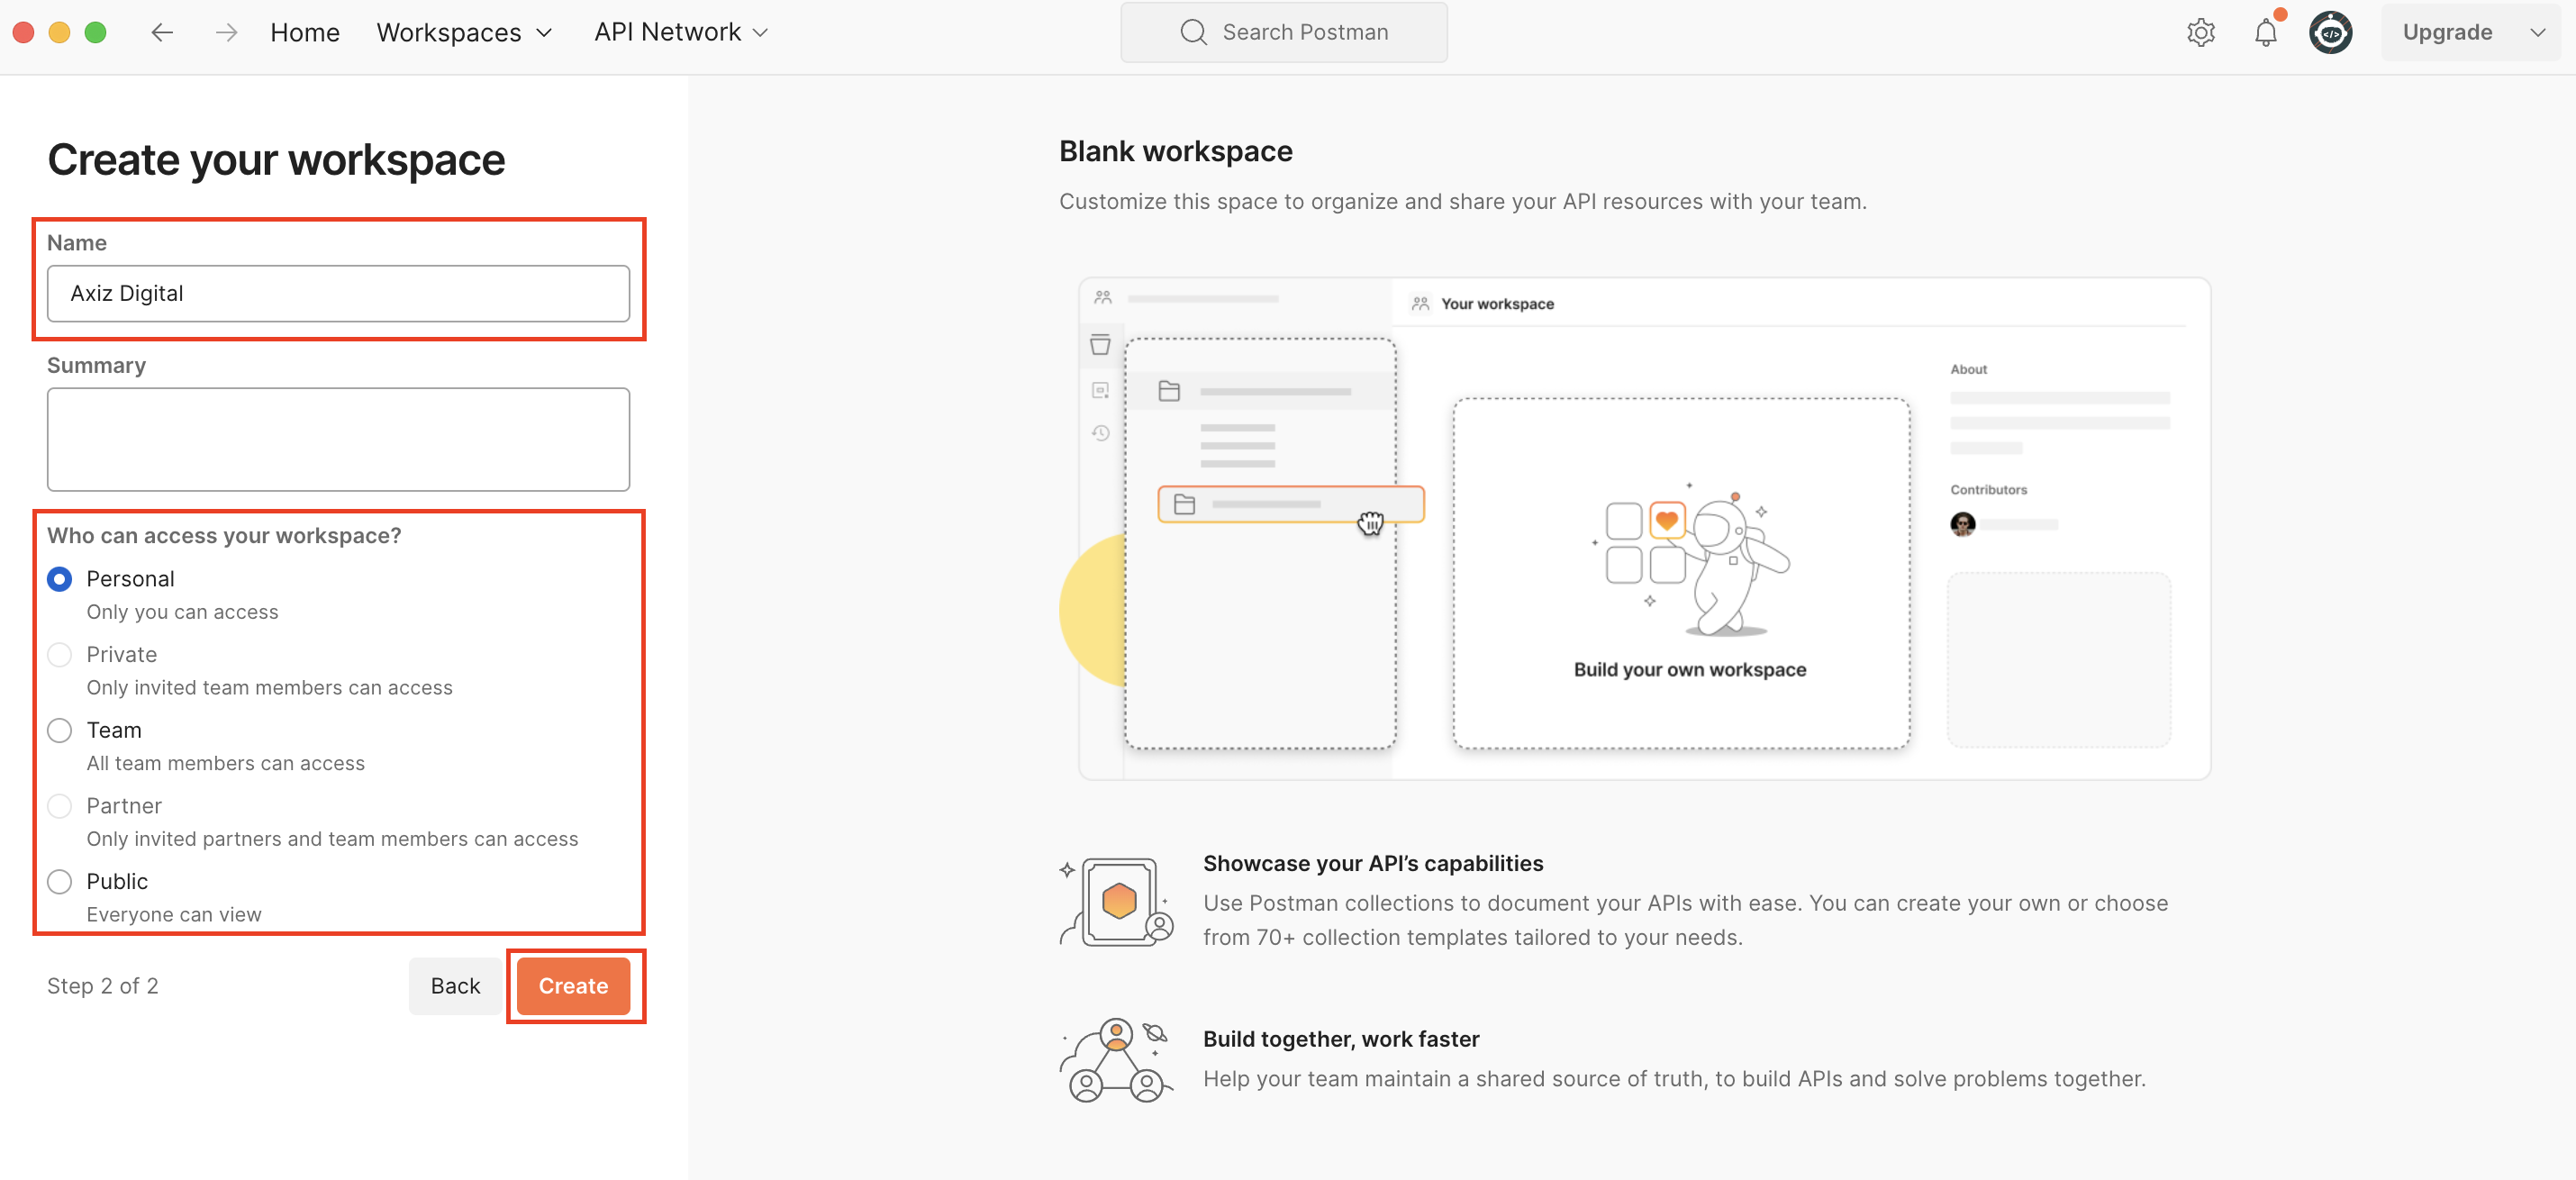
- Select Blank workspace from the menu on the left and click Next.

- Give your workspace a Name and provide a Summary/Description should you wish.
- Choose who should have access to the workspace.
- When you are done, click "Create."
Be careful before creating public workspaces. Anyone in the Postman community can access a public workspace.
Step 4: Create a new collection and request
- Create a collection:
-
We are going to call the Get All Customer endpoint. You can organise your requests in anyway, but for the purpose of this guide we will group all the customer related requests in a Customer collection.
-
You can can create a new collection by either clicking on Create Collection or the + icon and selecting **Blank collection.
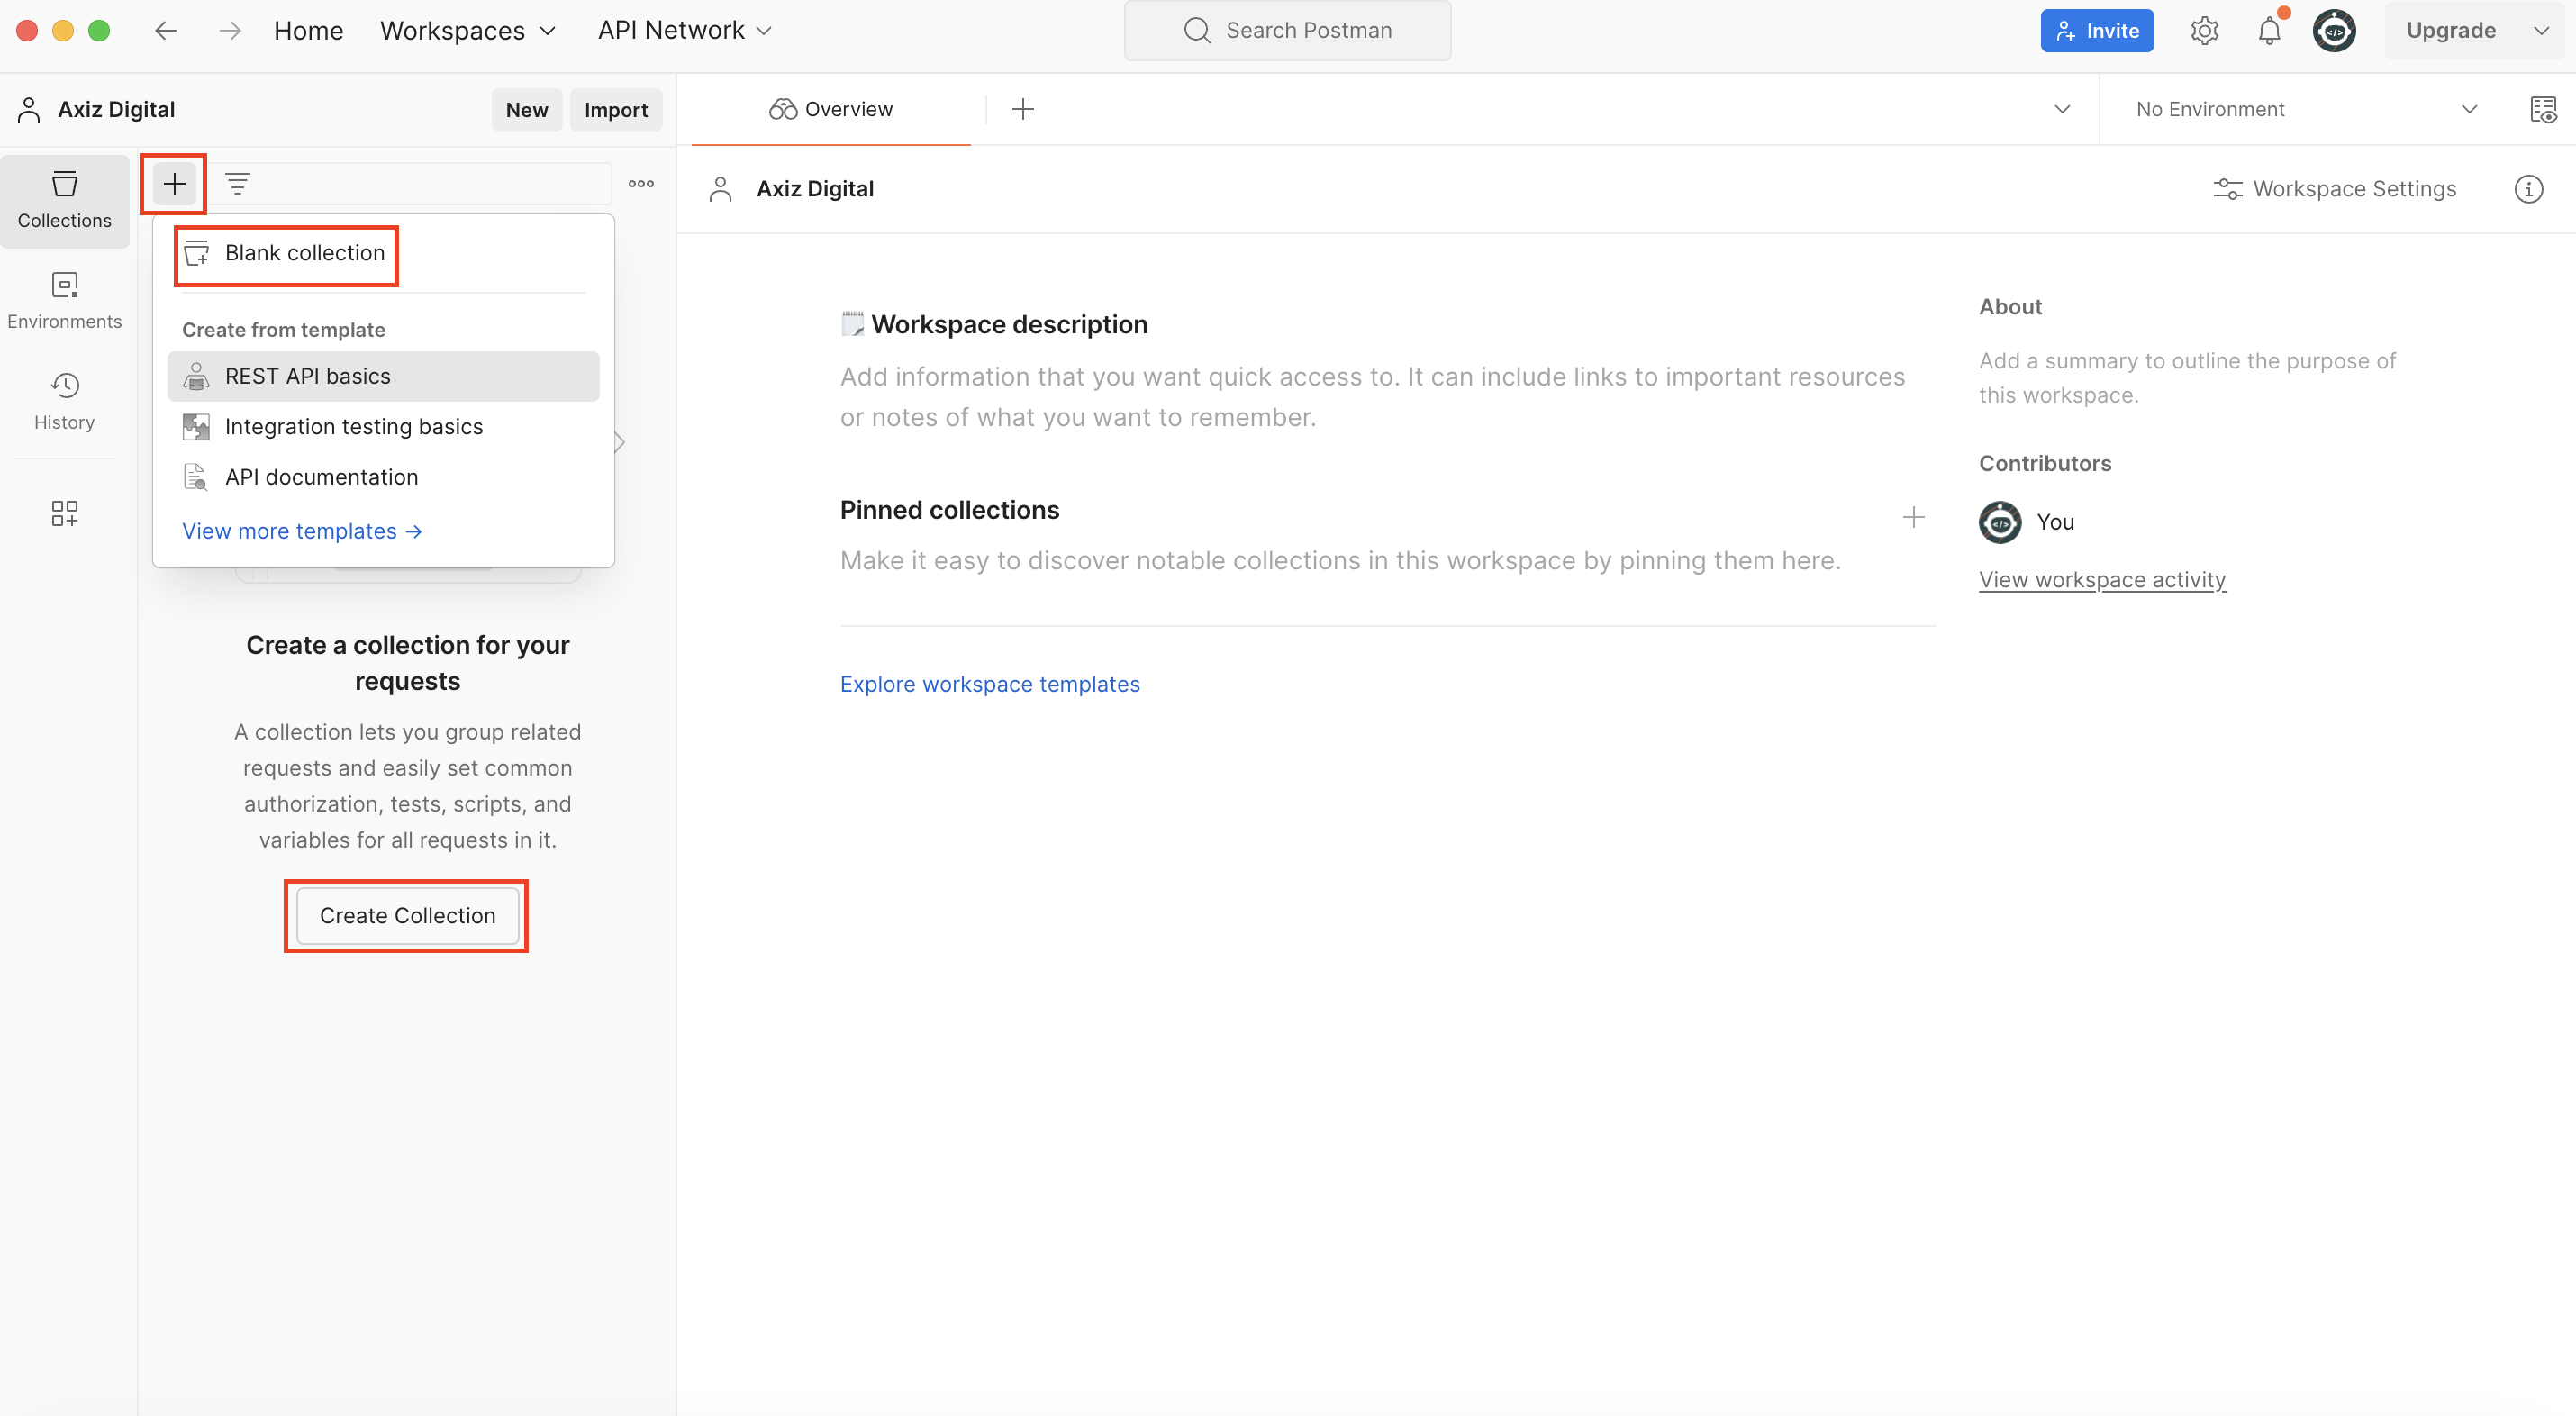
-
Be sure to give your collection a descriptive name.
-
Create your first request by New and selecting HTTP from the dialog displayed.
-

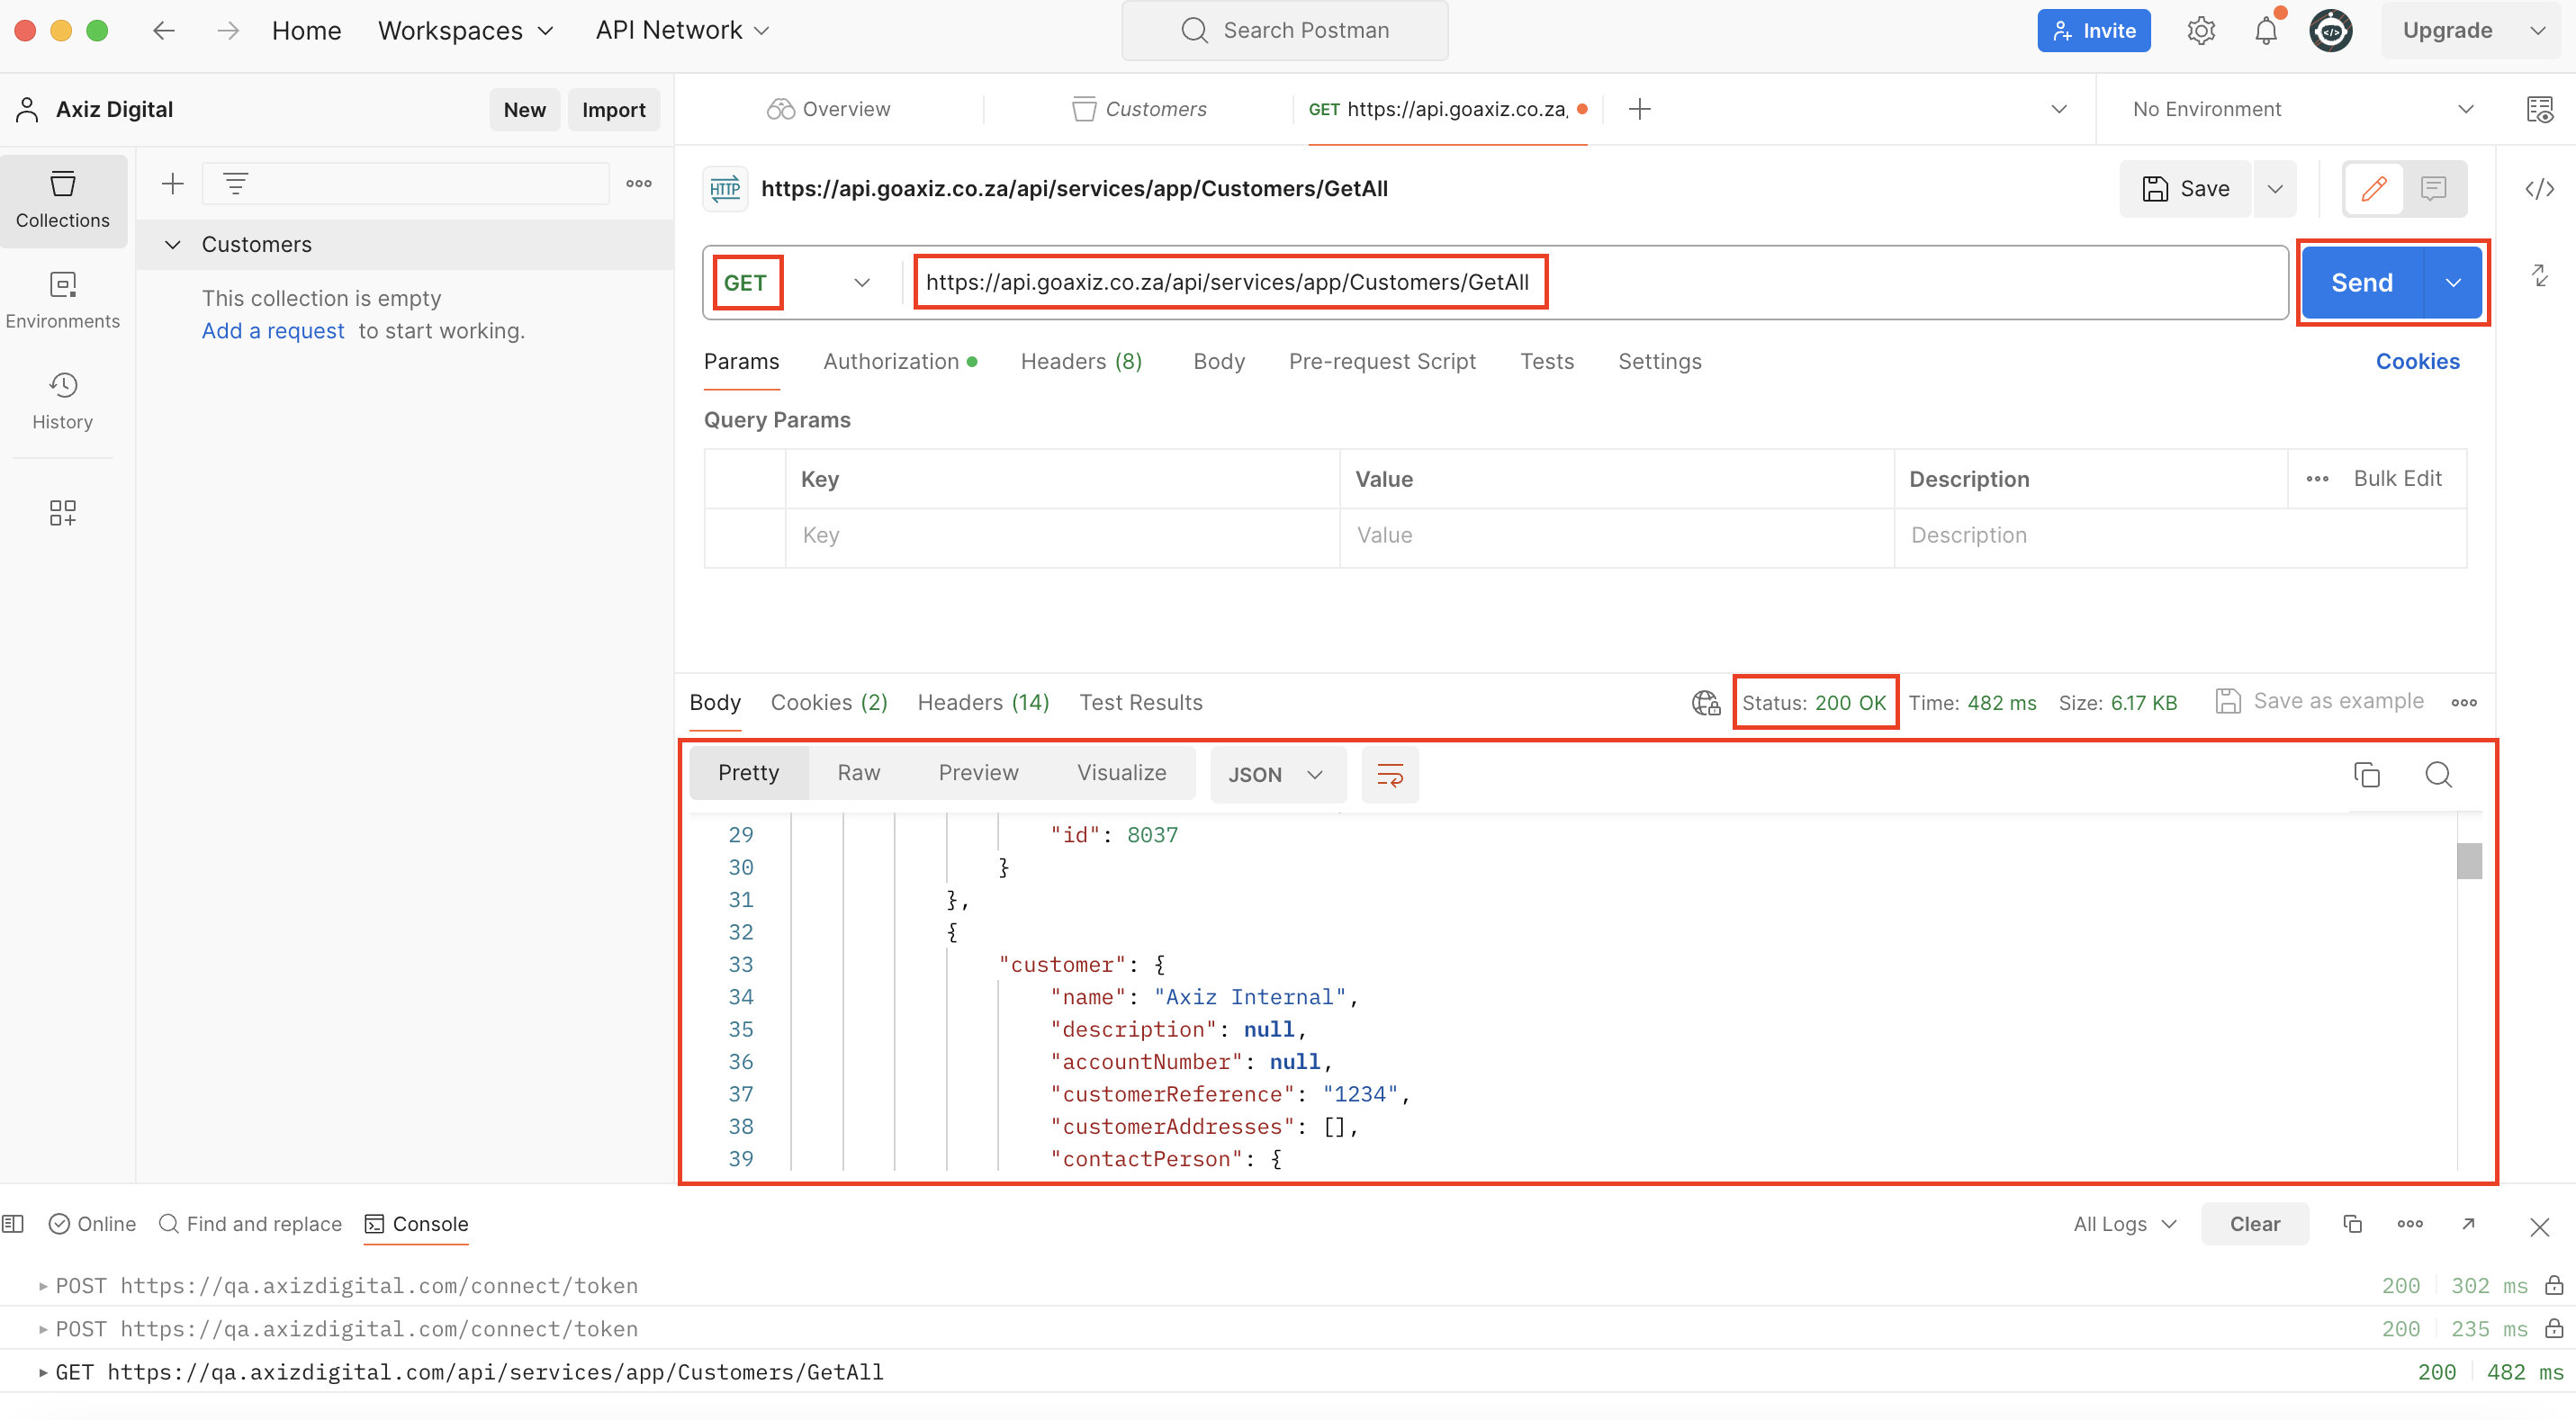
Step 5: Get all customers
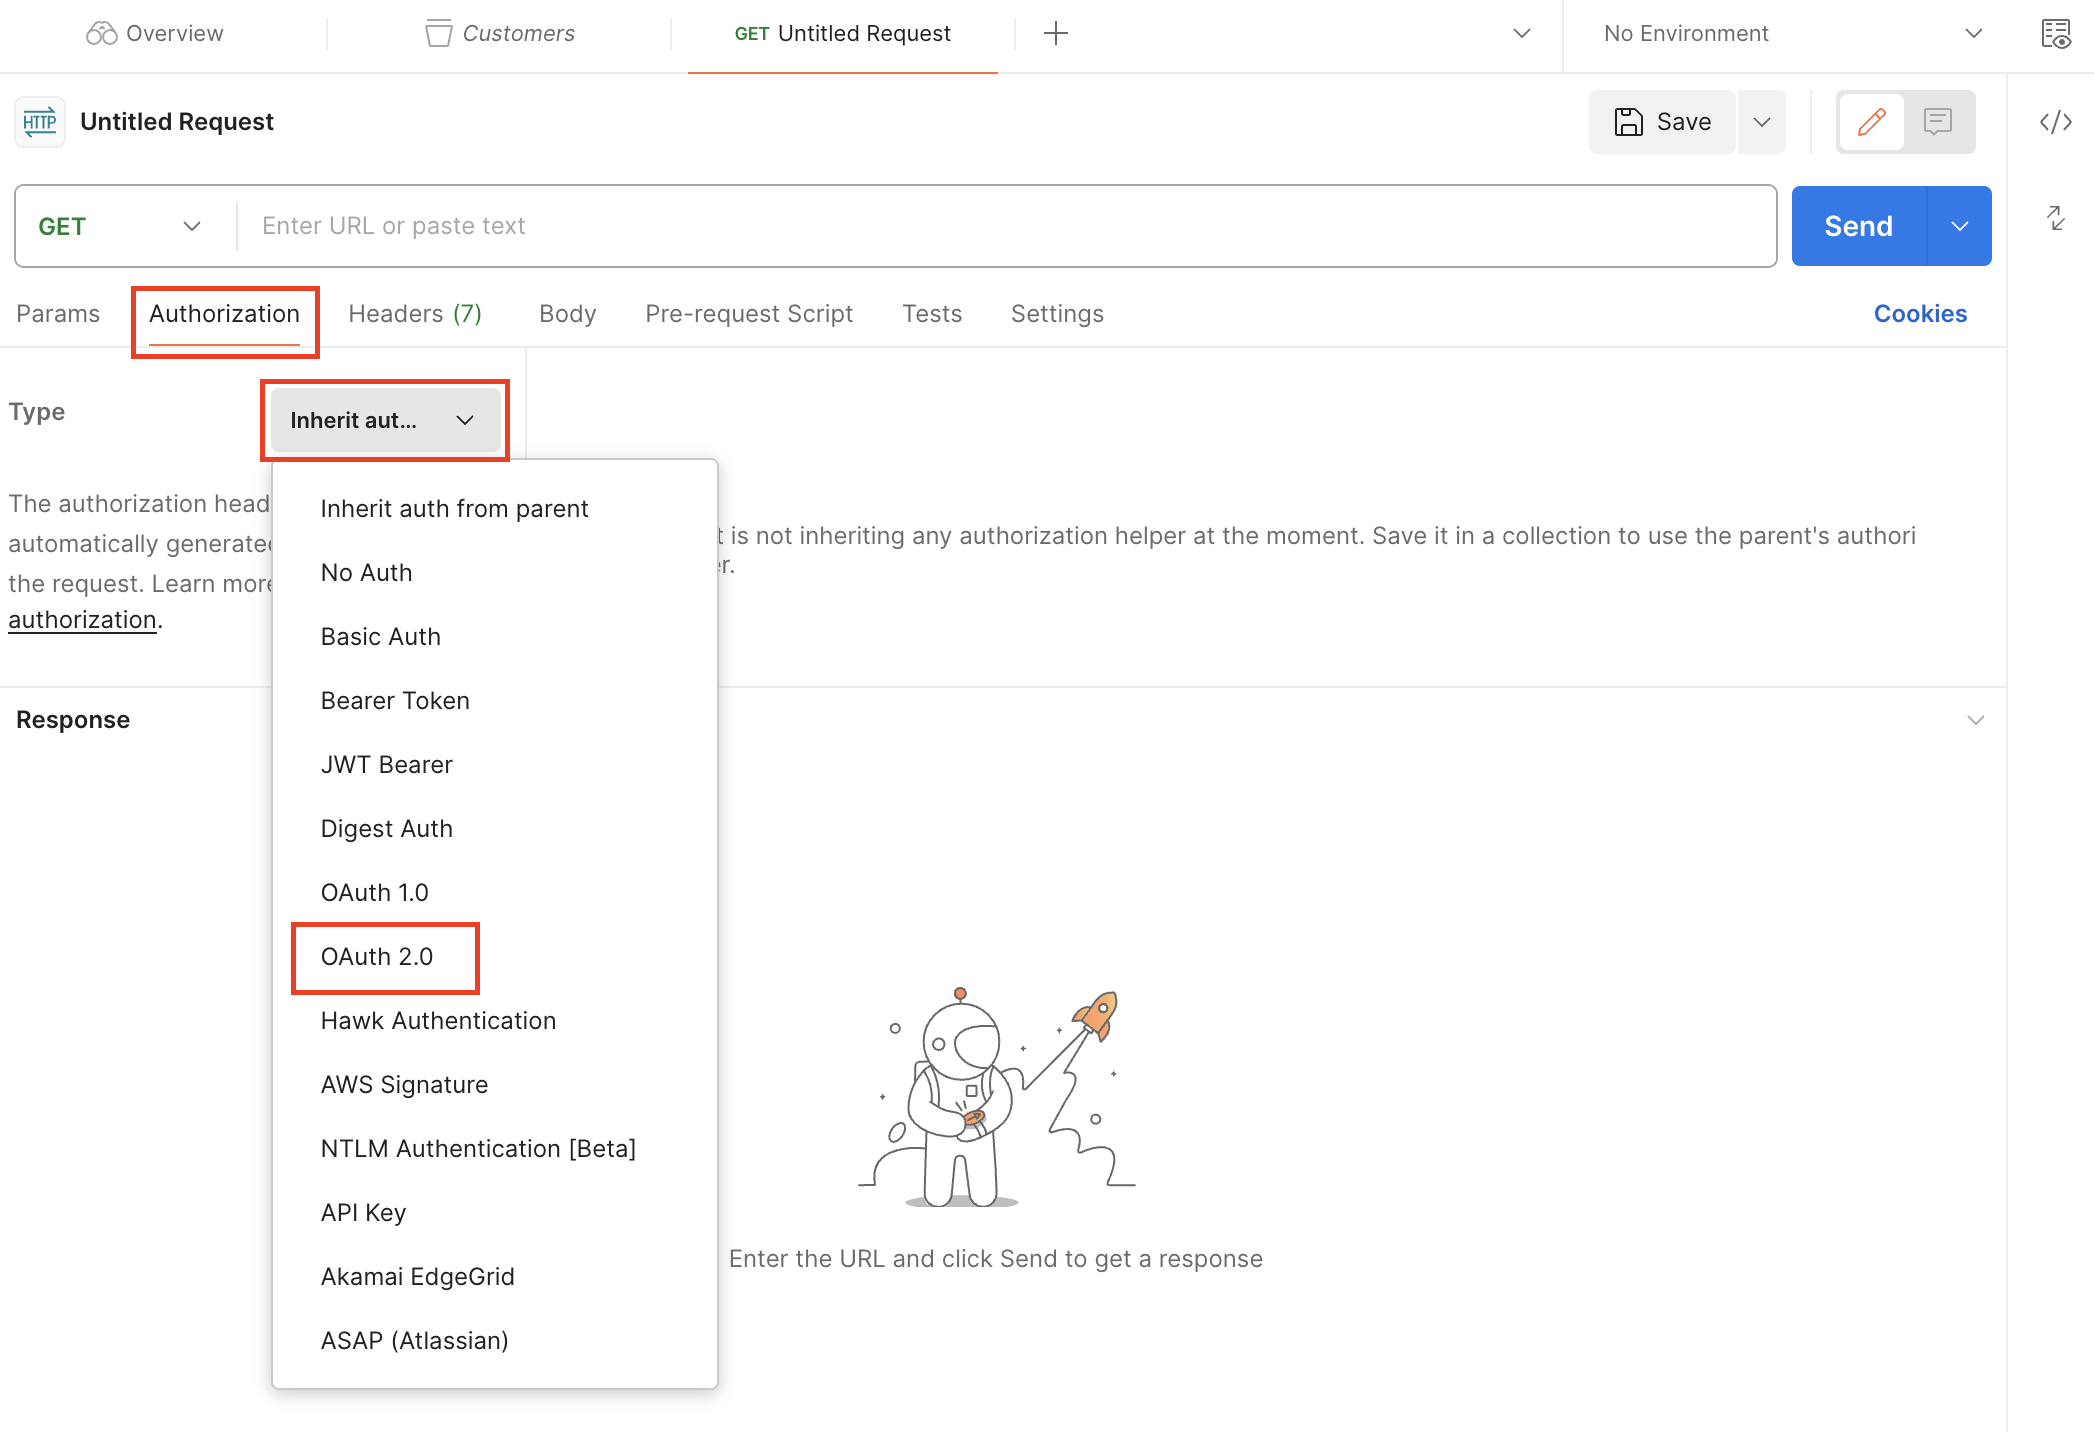
- Authorization:
- On the Authorization tab, set the authorization type to OAth 2.0.
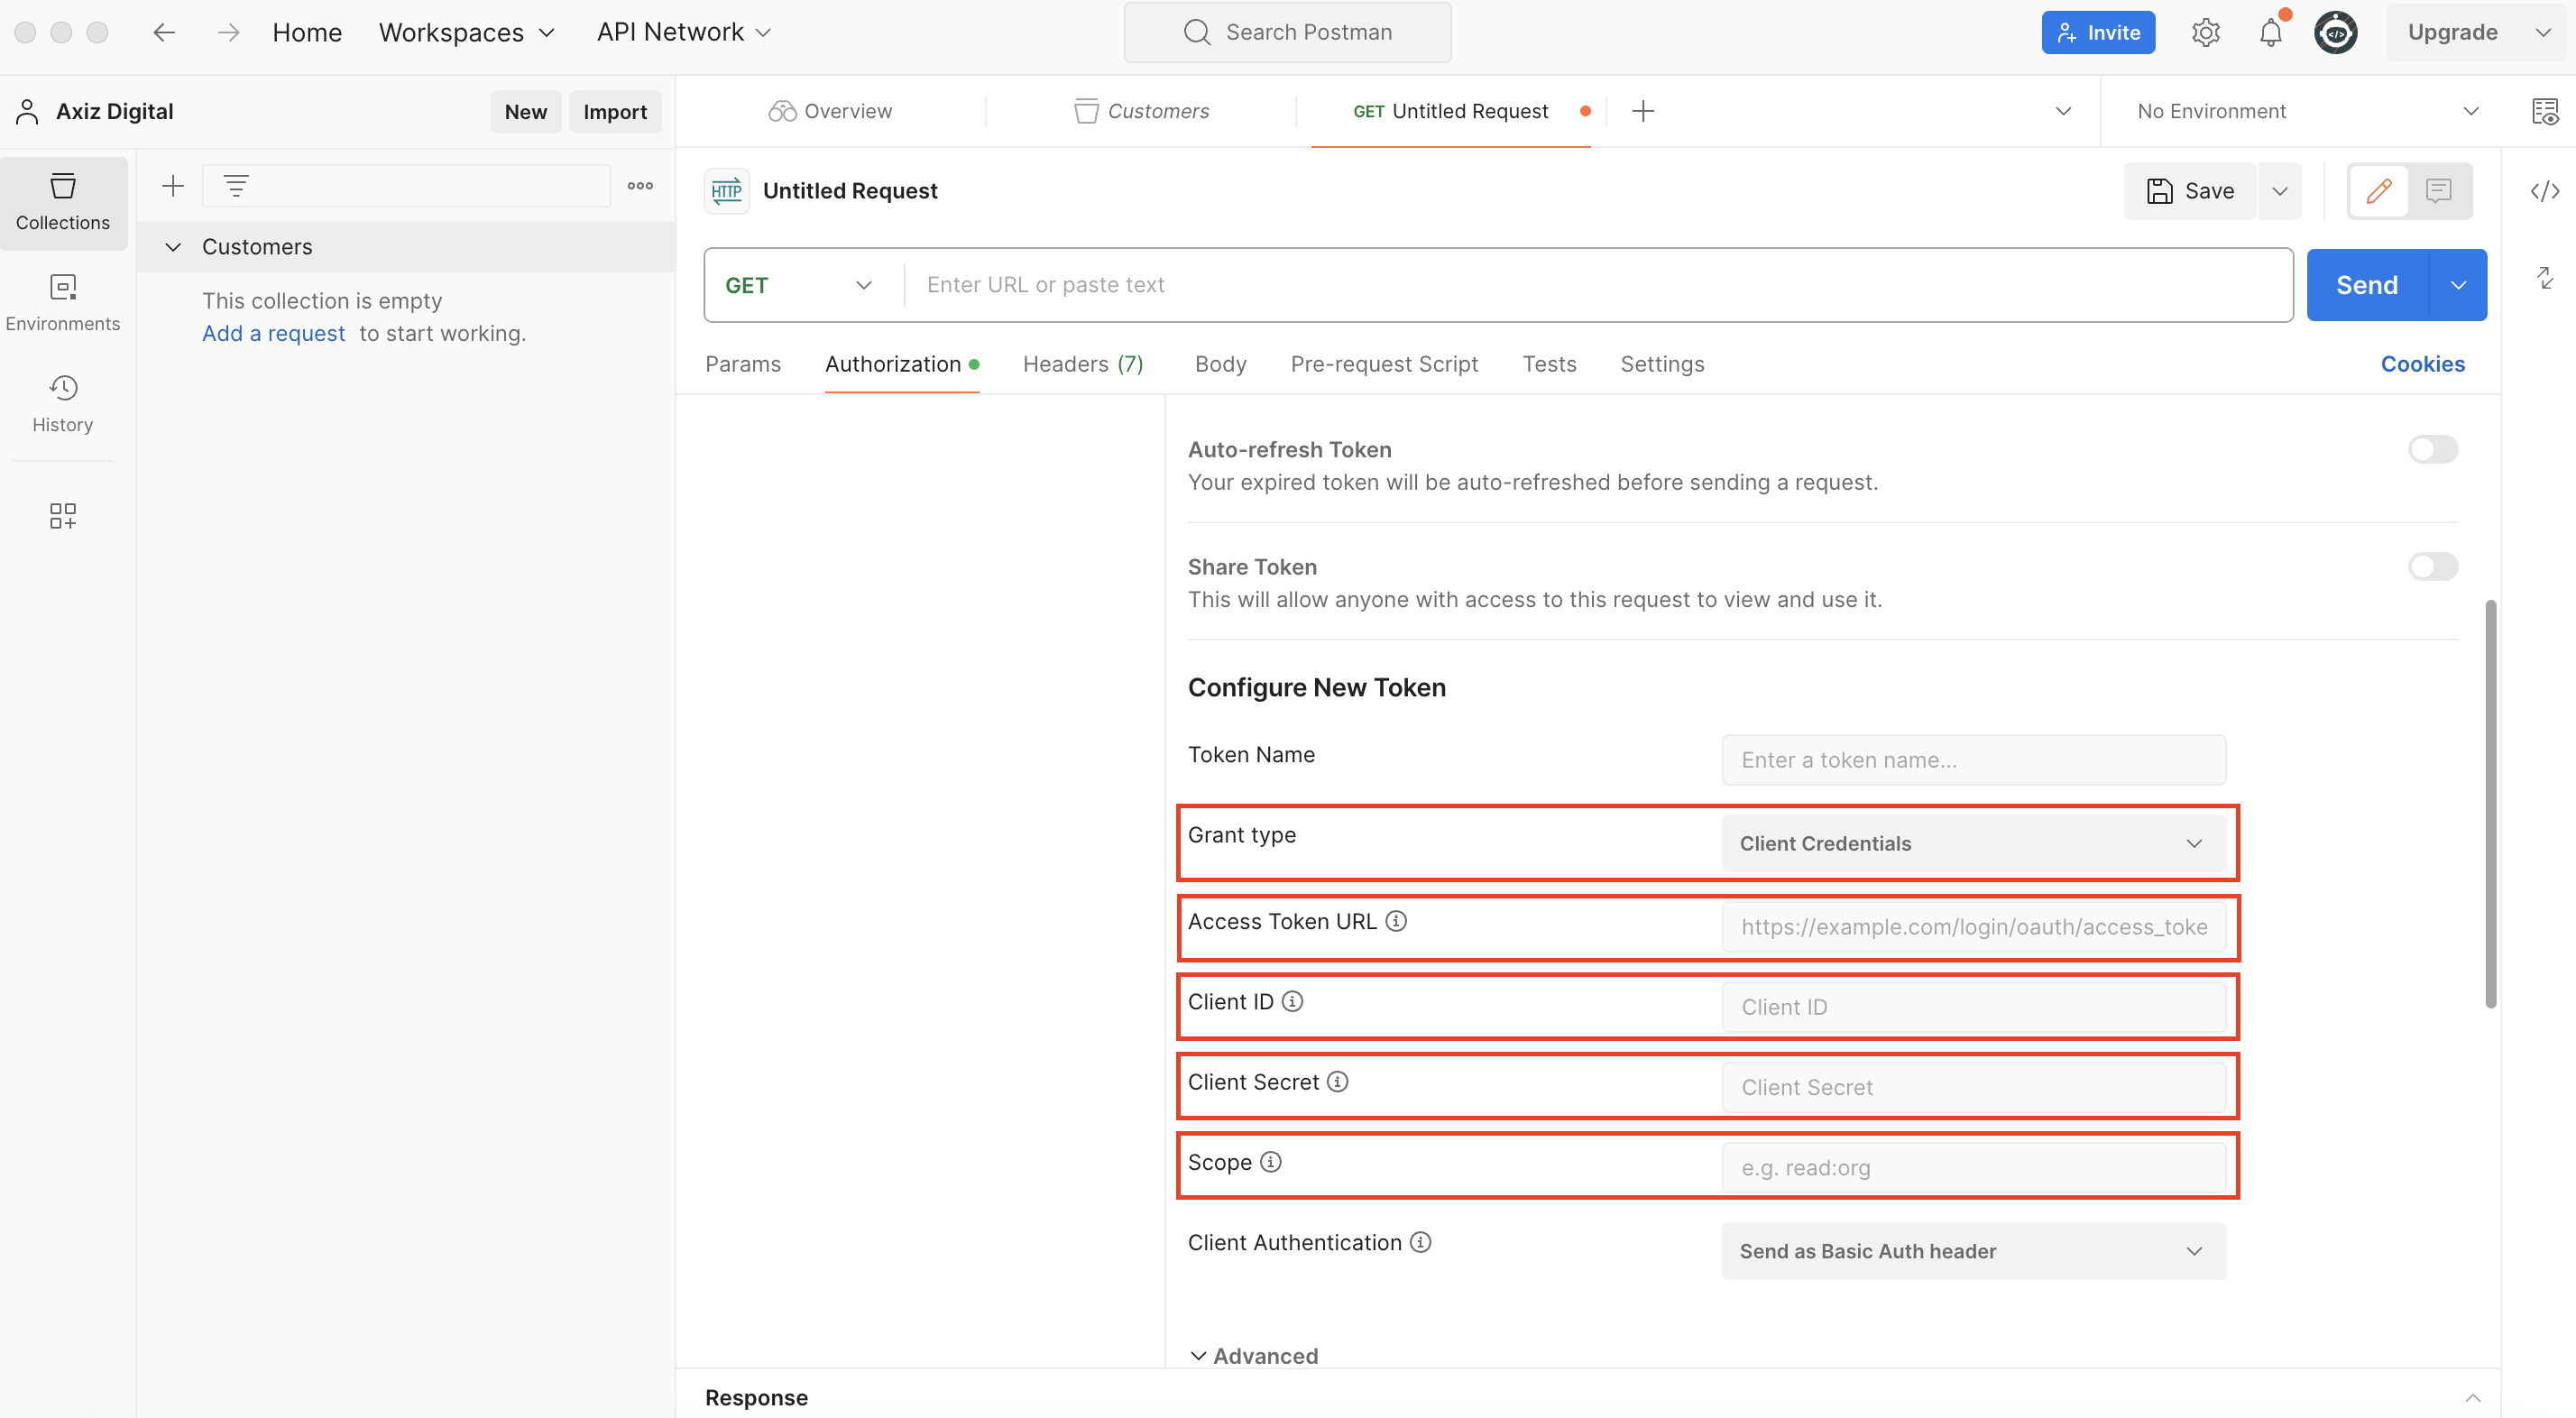
- Configure new token:
- On the Authorization tab, set the following properties.
| Property | Value |
|---|---|
| Grant type | Client Credentials |
| Access Token URL | https://identity.goaxiz.co.za/connect/token |
| Client ID | Your Axiz Digital account Client ID |
| Client Secret | Your Axiz Digital account Client Secret |
| Client Scope | Your Axiz Digital account Scope |
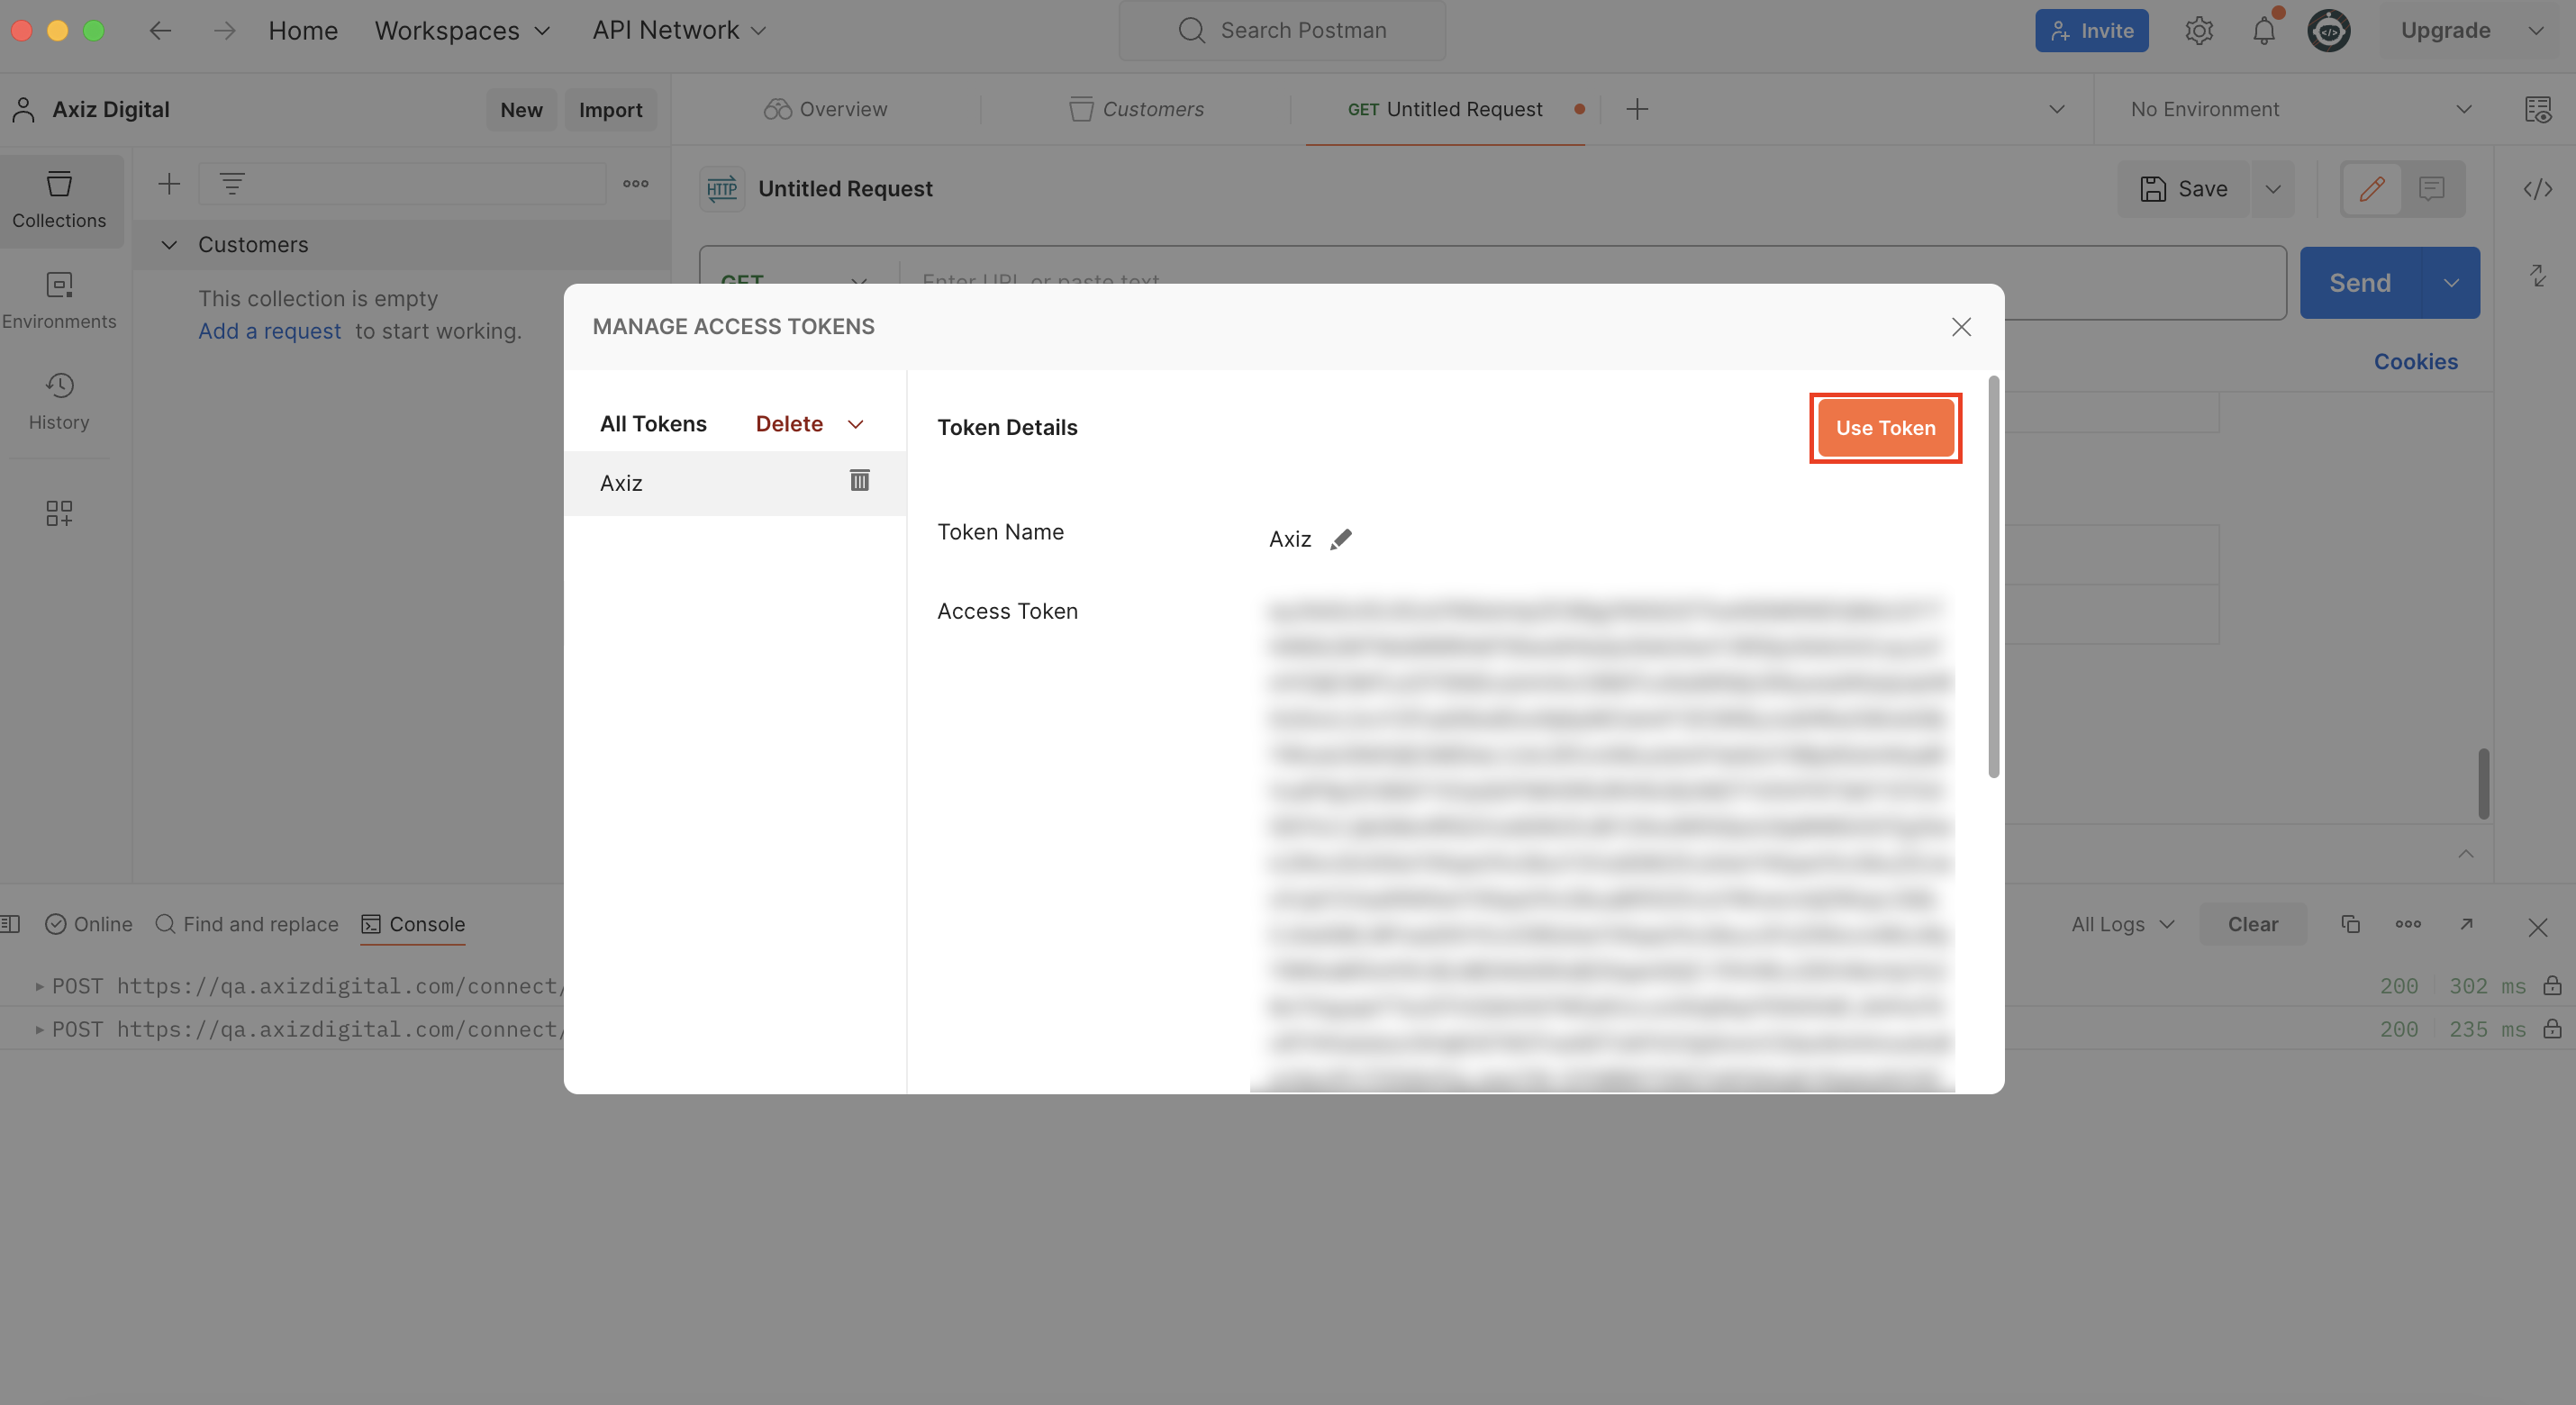
- Click on the Get New Access Token located at the bottom of the Authorization tab.
- You can copy the bearer toke or click on the Use Token button. The bearer token will now be used for the customer request we are going to setup.
- Setup the Get All Customers* call by setting the following properties.
| Property | Value |
|---|---|
| Request Type | Get |
| URL | https://api.goaxiz.co.za/api/services/app/Customers/GetAll |
- Click on the Send button.
- You should get a status response of 200 OK and the response payload displayed in the Body tab.